> ## Documentation Index
> Fetch the complete documentation index at: https://docs.practicemate.com.au/llms.txt
> Use this file to discover all available pages before exploring further.
# Add and use Media
> Upload a reusable image to PracticeMate Media and insert it into an Email Template.
In this guide, you will add a reusable Media item and use it in an Email Template.
The example uses a **Letterhead** image. The same steps work for other patient-facing Email images your Practice wants to reuse.
## Before you start
Prepare the image you want to upload.
PracticeMate accepts:
* **PNG**
* **JPEG**
* **WebP**
The image must be **2 MB or smaller**.
In the sidebar, under **Comms**, select **Media**.
## Upload the image
Select **Upload Media**.
PracticeMate opens the Upload Media dialog.
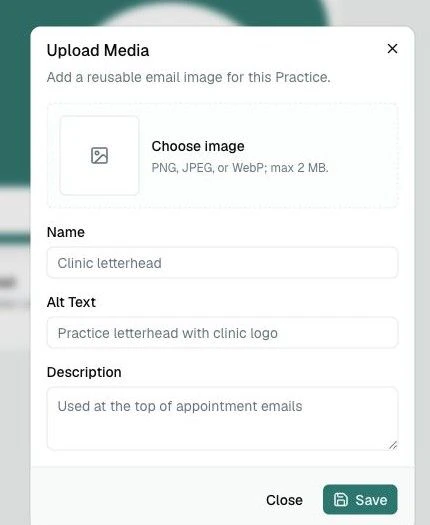 Select **Choose image**, then choose the PNG, JPEG, or WebP image from your computer.
Use a name your team will recognise later.
For this example, enter **Letterhead**.
Alt text should describe the image briefly.
For this example, enter **PracticeMate Letterhead**.
Use the description when it helps your team remember where the image belongs.
For this example, enter **Used for email intros**.
Select **Save**.
When the upload has finished, the image appears on the Media page.
Select **Choose image**, then choose the PNG, JPEG, or WebP image from your computer.
Use a name your team will recognise later.
For this example, enter **Letterhead**.
Alt text should describe the image briefly.
For this example, enter **PracticeMate Letterhead**.
Use the description when it helps your team remember where the image belongs.
For this example, enter **Used for email intros**.
Select **Save**.
When the upload has finished, the image appears on the Media page.
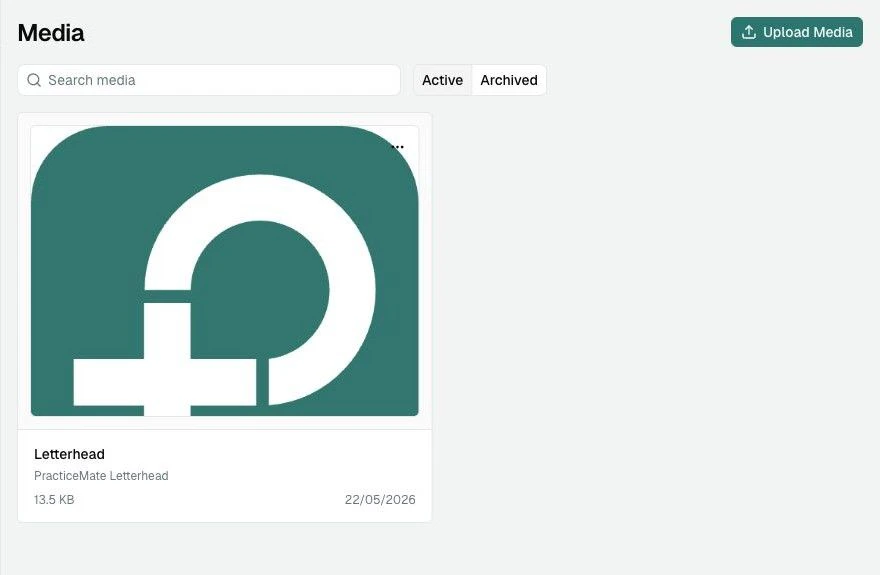 The image is now available for Email Templates and Template Components.
## Use Media in an Email Template
In the sidebar, under **Comms**, select **Templates**.
Create a new Email Template or open an existing Email Template.
The image is now available for Email Templates and Template Components.
## Use Media in an Email Template
In the sidebar, under **Comms**, select **Templates**.
Create a new Email Template or open an existing Email Template.
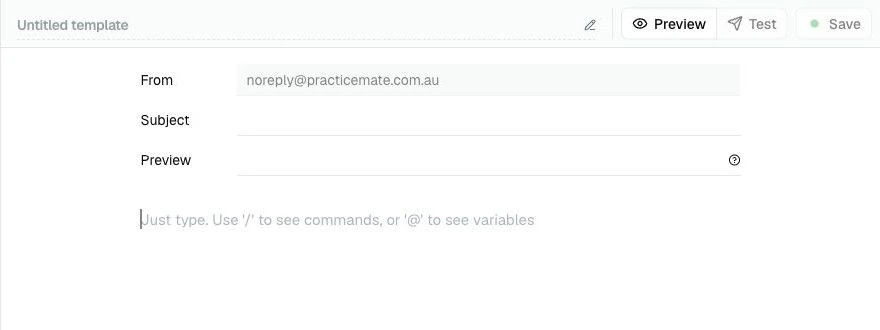 Click into the Email body, type **/**, then choose **Image**.
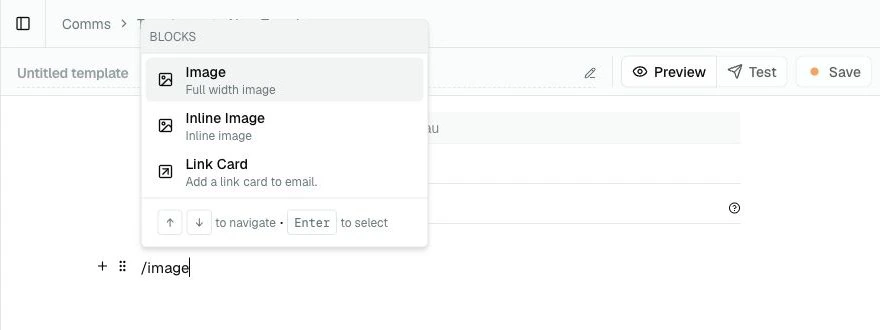 PracticeMate adds an empty image block.
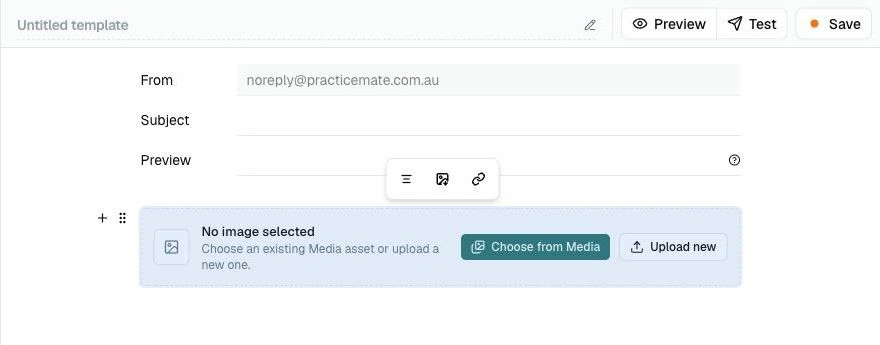 Select **Choose from Media**.
The Choose Media dialog shows active Media items for your Practice.
Select **Choose from Media**.
The Choose Media dialog shows active Media items for your Practice.
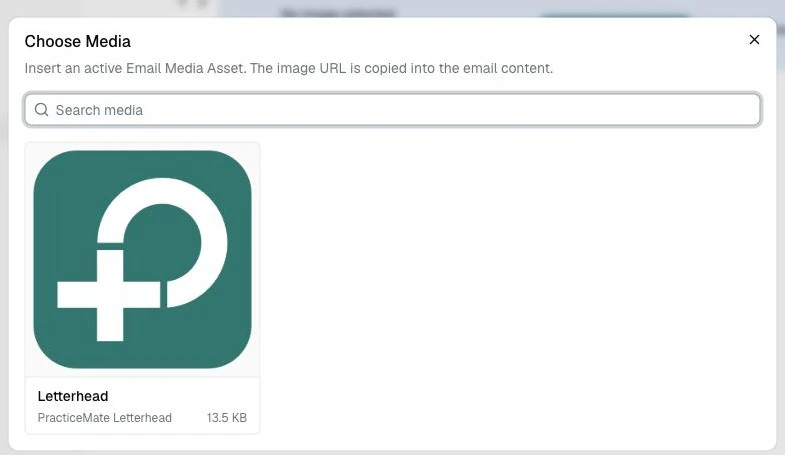 Select **Letterhead**.
PracticeMate inserts the image into the Email Template.
Select **Letterhead**.
PracticeMate inserts the image into the Email Template.
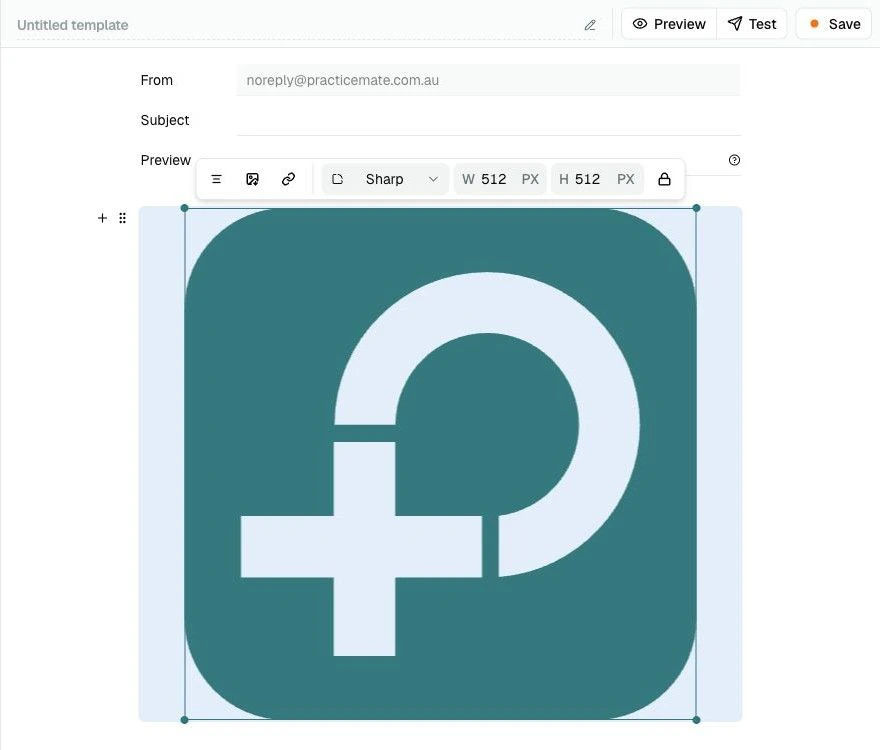 The image URL and alt text are copied into the Email content. From here, adjust the image size or layout if needed, then continue writing the Email Template.
If the image should appear in many Email Templates, consider putting it into a
Template Component. That gives your team one reusable content block to insert
where needed.
## Upload while editing
If you are editing an Email Template and realise the image is not in Media yet, select **Upload new** from the empty image block.
This opens the same Upload Media dialog. After saving, PracticeMate inserts the newly uploaded image into the Email Template.
## Save and test
When the Email Template is ready:
Select **Save** so the image and Email content are stored together.
Use **Preview** to check the layout on mobile and desktop.
Use **Test** to send a copy to yourself or another team member before using
the Template with patients.
Always check patient-facing images before sending. Make sure the image is
current, readable on a phone, and appropriate for the Patient Cohort receiving
the Communication.
## What you learned
You used:
* **Comms > Media**
* **Upload Media**
* Media name, alt text, and description
* the **/** menu in an Email Template
* **Choose from Media**
* the **Letterhead** Media item
* **Preview**, **Test**, and **Save** as final checks
Next, learn how Media fits with [Email Templates](/templates/first-email-template) and reusable [Template Components](/components/overview).
The image URL and alt text are copied into the Email content. From here, adjust the image size or layout if needed, then continue writing the Email Template.
If the image should appear in many Email Templates, consider putting it into a
Template Component. That gives your team one reusable content block to insert
where needed.
## Upload while editing
If you are editing an Email Template and realise the image is not in Media yet, select **Upload new** from the empty image block.
This opens the same Upload Media dialog. After saving, PracticeMate inserts the newly uploaded image into the Email Template.
## Save and test
When the Email Template is ready:
Select **Save** so the image and Email content are stored together.
Use **Preview** to check the layout on mobile and desktop.
Use **Test** to send a copy to yourself or another team member before using
the Template with patients.
Always check patient-facing images before sending. Make sure the image is
current, readable on a phone, and appropriate for the Patient Cohort receiving
the Communication.
## What you learned
You used:
* **Comms > Media**
* **Upload Media**
* Media name, alt text, and description
* the **/** menu in an Email Template
* **Choose from Media**
* the **Letterhead** Media item
* **Preview**, **Test**, and **Save** as final checks
Next, learn how Media fits with [Email Templates](/templates/first-email-template) and reusable [Template Components](/components/overview).